![]()
![]() Electric
Quartz Infrared Heaters
Electric
Quartz Infrared Heaters
|
|
|
|
|
It
is very important that you check this technical help in case you are
experiencing any difficulty with your heater since there is no return or refund
on these items as stated in the policy.
Troubleshooting and Technical Help for the
Infrared Quartz Heaters
Make sure that outlet has electricity. You can check it by plugging your
radio, lamp etc... into that outlet!
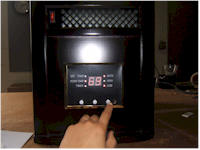
A. Light for SET TEMP: click the + - buttons to set the temperature. When the
light for SET TEMP is on, it shows the setting temperature. The monitor will
flash four times and the monitor shows the room temperature then the light will
go OFF.
B. Light for ROOM TEMP: when the heater is working, the monitor shows the room
temperature ranging between 32 and 99 F.
C. Light for AUTO: when the light for AUTO is ON, the heater's working
condition is automatic. Upon turning the unit on, the default temperature is 70
F which you can set to your own desired temperature by pressing the + or the -
button.
D. Light for HIGH: in this case the heater is operating in the heating
temperature mode.
E. Light for LOW: when this LOW display is on, your unit is operating in the LOW
temperature setting.
F. Light for TIMER: when the TIMER is on, the heater will turn on and off
automatically according to your set temperature.
G. Mode button: is used to switch between AUTO, HIGH and LOW settings.
H: MODE and TIMER buttons on remote control: These have the same functions as
the buttons on the heater. Timer button is used for setting on/off functions,
time ranging between 1 and 12 hours.
|
|
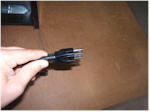
If the MODE button does not work: (but the switch is lit)
Sometimes, due to vibrations during shipping, the connectors may get loose and disconnected. It is very easy to solve this problem.
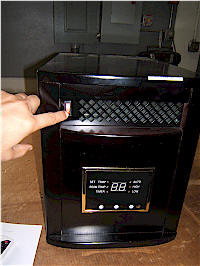
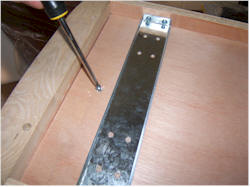
1/ Unplug the unit. 2/ Pull out the control panel and remove the two connectors
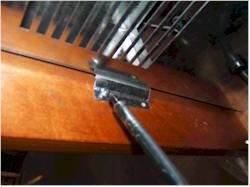
3/ Unscrew the bottom.
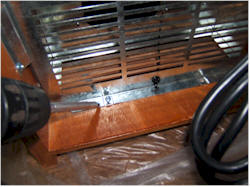
4/ Unscrew the sides and the bottom holders.
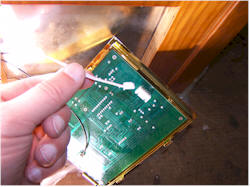
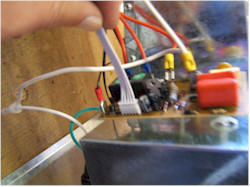
5/ Pull out the inside of the unit and check the white connector for firm connection.
6/ Push back the inside unit and follow the steps from 1 - 5 in reverse.
|
If you are still experiencing problems with your heater, please follow the instructions as stated in the Liquidation Sale Policy which was stated at the time of sale, located on your product page.
Copy below: Any product(s) purchased under the term of liquidation sale must have the following policy: Items are liquidated at such a prices that the seller has no profits to cover any additional fee(s) or services after sale. You purchased your item at a price that is usually under the seller's cost, and sometimes the freight and advertising costs alone are higher than the product's liquidation price. Therefore, all sales are final without refund or return but products may carry warranty as displayed on their product pages. Any shipping damage must be reported to seller in writing within seven days of receipt so the damaged part(s) can be replaced. Product(s) cannot be refused due to damage, as damaged part(s) will be replaced by the seller to speed-up the process. If product is refused, all the actual freight charges will be deducted from the buyer's account. Once the product is received, no claims for suitability or product's description in advertising will be accepted. Any shipping costs for replacement part(s) during the warranty period (including shipping damage) must be paid by purchaser. Seller may use other shipping company than UPS, at their own discretion. No exceptions to this policy under any circumstances, and by purchasing our product, purchaser agrees to and understand this Liquidation Sale Policy.Step 1. Send us the heater to: Omegastores 314 Main St #4572 Wallingford, CT 06492 Include a canceled check for the return shipping and the repair costs. Repair cost can be determined after the item is received. Step 2. We will email you the approximate shipping date on which you will receive your repaired heater.